
Cleaning your own solar panels is something you can do, and for light surface contamination it is the right call. The method is not complicated. What matters is knowing where it stops working, because the point where DIY becomes damaging is not always obvious from the ground.
This article covers the correct method, the tools, and the three situations where a brush and a hose will not solve the problem.
DIY cleaning works for light surface soiling. It does not work for biological growth. These are different problems that need different approaches, and the distinction matters before you pick up a brush.
If your panels have a general grey film, bird droppings, or pollen, a DIY clean is the right starting point.
If you can see green or grey patches, white crusting around the edges, or any growth that has been there across multiple seasons, that is biological growth, and the method below will not remove it safely. Attempting to scrub established lichen off a solar panel with a household brush will permanently scratch the anti-reflective coating. That damage cannot be undone. Read the biological growth section before you start.
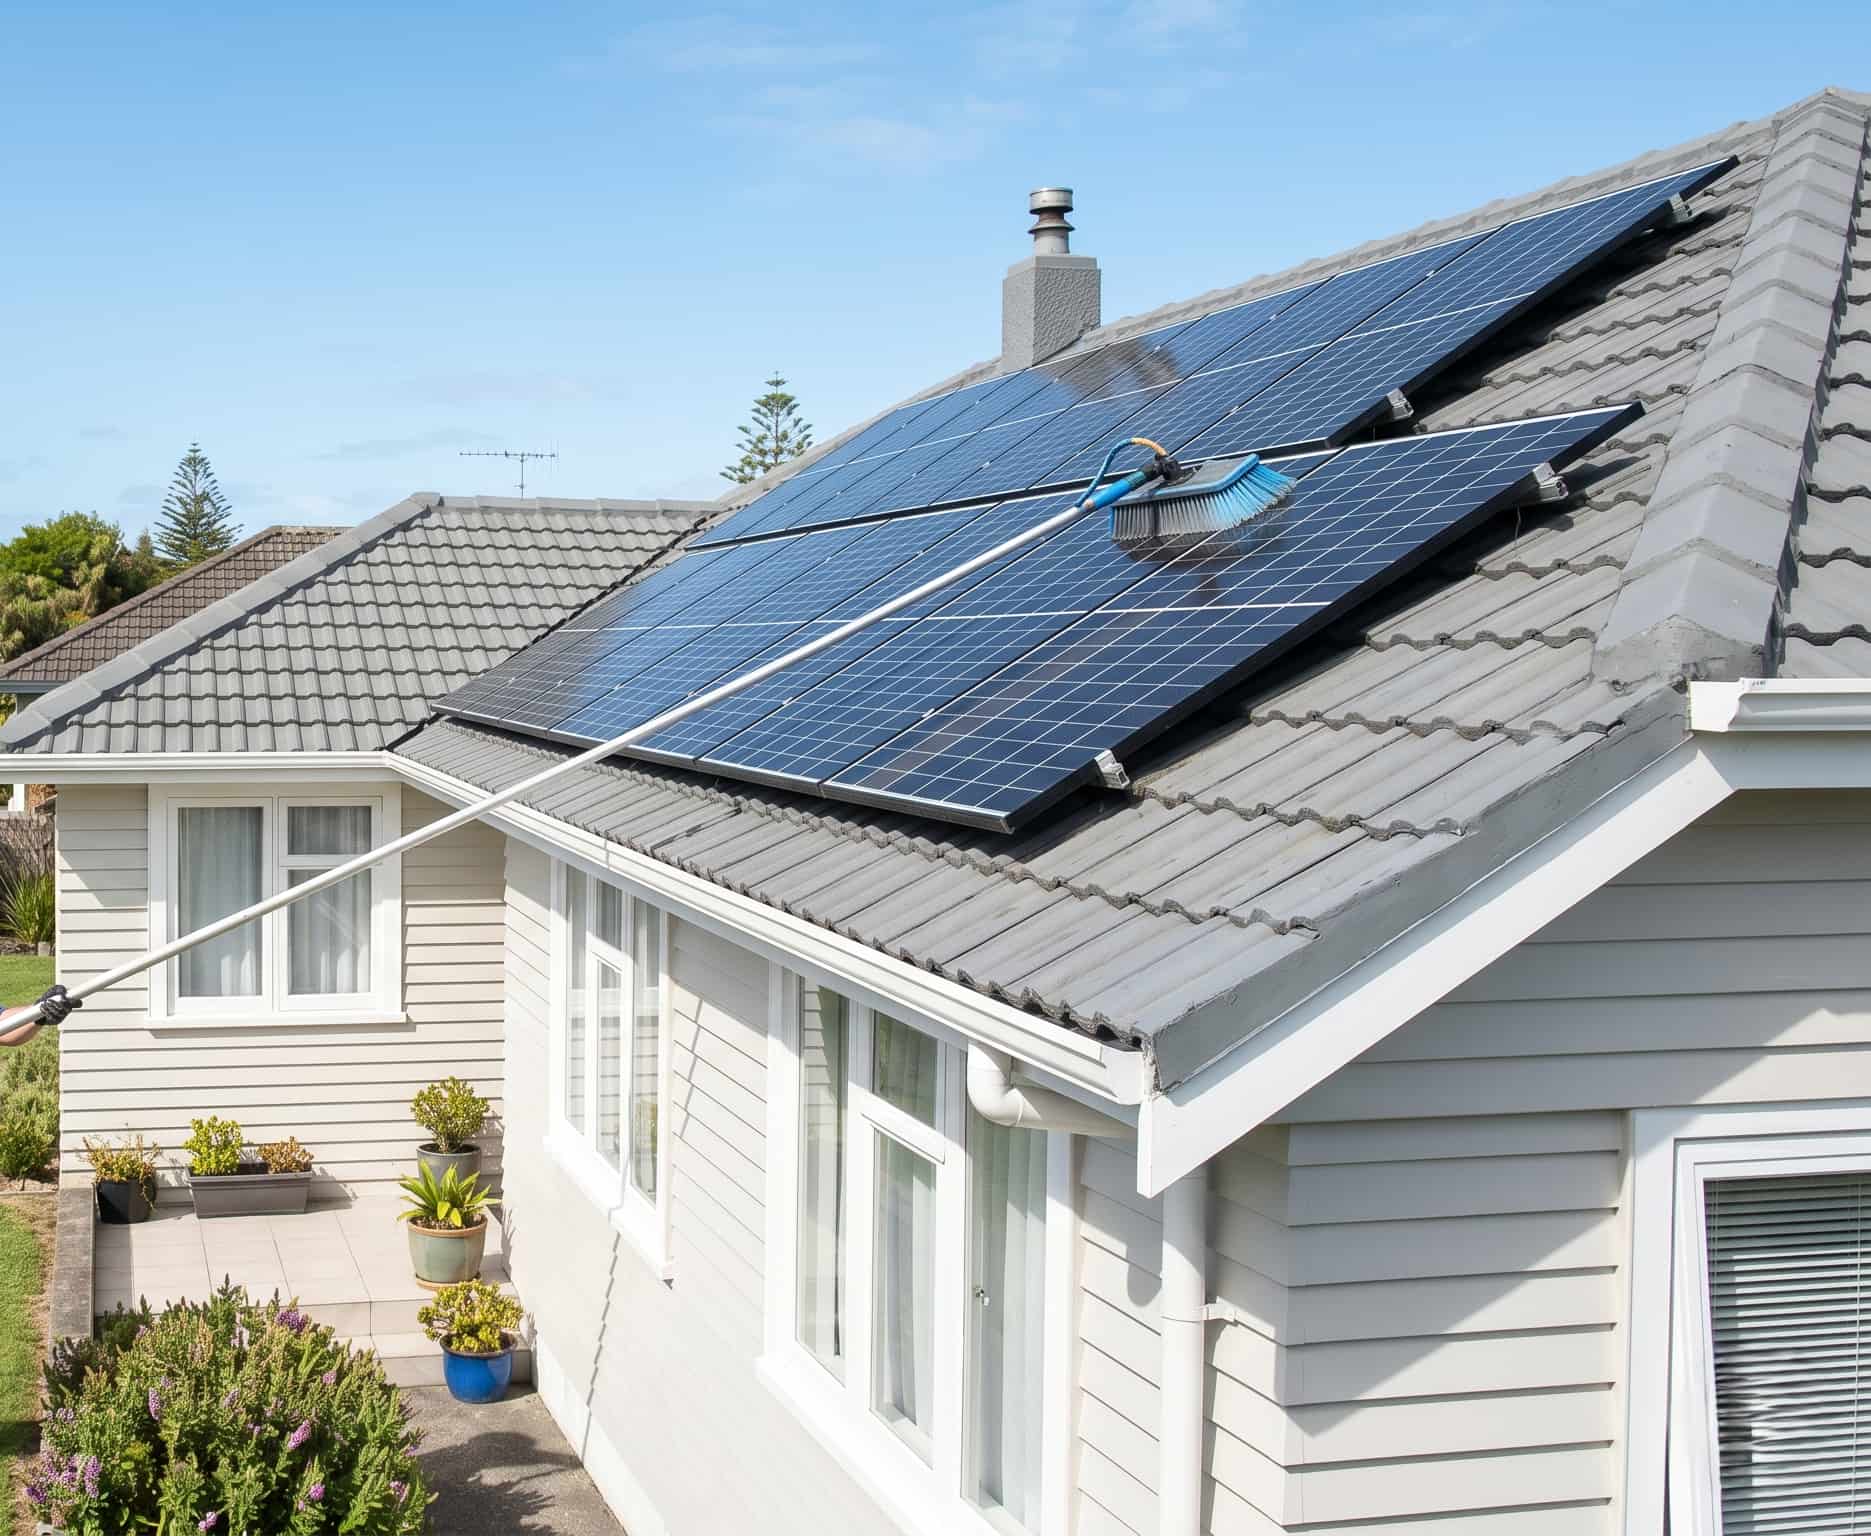
A soft-bristle brush, nylon not metal, ideally on an extension pole so you can reach the panels without going onto the roof. A standard garden hose with a gentle spray nozzle. A small amount of mild, non-abrasive dish soap if you are dealing with bird droppings or stubborn deposits. Clean water. If your tap water is hard or high in minerals, using rainwater for the final rinse will reduce the chance of streaking on the glass.
That is all. You do not need specialist solar cleaning products, commercial degreasers, or any product marketed specifically for solar panels. Most add no benefit and some cause harm.
Do not use: pressure washers, abrasive pads, stiff-bristle brushes, steel wool, razor blades, or any cleaner containing acid, alkali, ammonia, or acetone. These damage the anti-reflective coating, strip the frame seals, and in most cases void the manufacturer's warranty.
Early morning is a practical choice, not a technical requirement. Auckland does not get hot enough for panel temperature to create meaningful risk when cleaning. The thermal shock concern you will see repeated across solar cleaning guides applies to desert climates where panels reach extreme surface temperatures during the day. In Auckland's temperate conditions, that risk is not relevant.
The practical reason to clean early is simpler: water sits on the glass long enough to do its job rather than evaporating mid-rinse on a hot summer afternoon. An overcast day works equally well. There is no requirement for water at any specific temperature.
Step 1. Shut the system down. Before any water goes near the panels, switch off both the AC and DC isolators following your inverter's shutdown procedure. Check the manual if you are unsure. This step is not optional.
Step 2. Inspect from the ground. Before you touch anything, look at the panels carefully. Check for visible cracks, damaged mounting hardware, loose wiring, or any biological growth. If you see cracked glass, damaged frames, or wiring that looks compromised, stop and call someone. Cleaning a structurally damaged panel is not the right first step.
Step 3. Dry brush first. If the panels are dusty rather than muddy, remove loose debris with a soft dry brush before introducing water. Wetting dry dust immediately can spread and smear it across the glass. Work gently.
Step 4. Rinse with a gentle hose stream. Low pressure only. Do not direct the jet at panel edges. Water forced under the frame seal causes water ingress that is not visible until it has already caused damage.
Step 5. Wash if needed. For bird droppings or stubborn deposits, add a small amount of mild dish soap to water and apply with your soft brush or a microfibre cloth. Work gently across the panel surface. Plain water is sufficient for general dirt.
Step 6. Rinse thoroughly. Remove all soap residue. Soap left on the panel attracts dust and can cloud the anti-reflective coating over time. Rinse until the water runs clear.
Step 7. Leave to air dry. Do not wipe the panels down. Wiping risks scratching the glass and leaves streaks. Let them dry naturally.
The safest DIY approach is ground level with an extension pole long enough to reach the panels. If your panels cannot be reached this way, the access risk on a residential roof needs to be weighed honestly against the benefit of cleaning. A fall from a roof is a serious injury. If the pitch is steep, the surface is wet, or you are not confident on the ladder, leave it.
Do not step on the panels. Pressure on the panel surface causes invisible micro-cracking that permanently degrades output.
Let what you observe from the ground guide the timing. A visible grey film, fresh bird droppings, or anything that has been sitting on the panels across multiple rain events is worth addressing. A fixed calendar is less useful than a visual check every few months.
Environment matters more than schedule. Homes near trees may need attention after spring pollen and autumn leaf falls. Flat or low-pitch roofs accumulate contamination faster because water does not run off efficiently. Coastal properties carry additional salt spray that builds a sticky film on both the glass and the aluminium frames.
For most Auckland residential installations, a professional service every one to two years is the right interval. Flat roofs, coastal locations, heavy bird activity, and homes under trees sit toward the shorter end of that range, sometimes tighter.
A soft brush and a hose handles light surface contamination. Three things sit beyond it.
Biological growth. Lichen, moss, and algae bond chemically to the glass surface. Attempting to scrub them off without proper chemical pre-treatment scratches the anti-reflective coating and, in most cases, leaves the growth intact because the anchoring mechanism has not been broken. The lichen article covers what biological growth does to a system and what proper treatment involves.
An assessment of what is actually there. A DIY clean produces clean panels. A professional visit produces a baseline.
Before any cleaning begins, an inverter output reading records what the system is currently generating. After the clean, a second reading records what it produces with clean panels. The difference between those two numbers is the objective measure of what the contamination was costing. That number does not exist after a DIY clean, because there is no reading taken before and after.
The inspection that precedes the clean is equally important. Panels, frames, mounting hardware, cabling, roof penetration seals, and isolators are assessed before anything is touched. A visual check from the ground does not cover any of this. Deteriorating frame seals, corroding mounting hardware, and early biological growth on the glass surface are all regular findings on systems that look fine from below.
A condition report after the visit documents what was found, what was done, and what needs monitoring. That is the record you can compare at the next visit. Without it, you have no way to know whether the system has changed between visits or whether any findings are new.
Any system that has never had professional attention. If your panels have not been properly assessed since installation, you do not have a baseline for what is developing on the roof. A DIY clean on a system with established biological growth you have not identified is not a productive exercise.
A solar system running at full capacity is doing something that a neglected one quietly is not. General soiling from dust and pollen causes modest output losses. Biological contamination is a different matter. Lichen left for two or more seasons creates hotspots, localised areas of severe overheating, that can permanently damage individual cells. The full picture on what contamination does to output is covered in the dirty panels article.
A system that has been inspected, cleaned, and documented is one you can actually measure. You know what it generated before and after. You know the condition of the frames and seals. You know whether anything needs attention before it becomes expensive. That is what Untapped Power means in practice: not a vague promise of more output, but a specific, measurable return to what the system was installed to do.
If you are not sure where your system stands, the Home Energy Health Assessment takes about three minutes and will give you a clear picture before you decide on next steps.
No. High-pressure water damages the anti-reflective coating and can force water under the frame seals, allowing water ingress into the panel structure. This voids most manufacturer warranties and causes damage that is not immediately visible. A standard garden hose with a gentle nozzle is the correct tool.
Rain removes some surface dust from steeply pitched roofs with consistent rainfall and light contamination. It does not clean flat or low-angle installations effectively, where water runs off too slowly to carry debris. It does not remove lichen, which bonds to the glass and requires specialist treatment. It does not remove bird droppings or tree sap. If your panels are on a low-pitch roof, Auckland's rainfall will not keep them clean.
Yes. Follow the inverter shutdown procedure and isolate both AC and DC isolators before any water approaches the panels. The manual for your specific system will have the correct sequence.
Will DIY cleaning void my warranty?The cleaning method determines warranty risk, not the act of cleaning itself. Using approved tools, a soft brush, gentle water, and mild soap if needed, is consistent with manufacturer guidelines. Using pressure washers, abrasive tools, or unapproved chemicals gives the manufacturer grounds to decline a warranty claim on any subsequent fault.
What if I can see green growth on my panels?Do not attempt to clean it with a standard brush and water. Established biological growth requires chemical pre-treatment before physical removal. DIY attempts with household tools risk permanently scratching the anti-reflective coating. This is a job for a professional using products and techniques rated as safe for solar panel surfaces.
How do I know if my panels need cleaning?Check from the ground every few months. A visible grey film, bird droppings, or any green or grey patches are signals to act. Your monitoring app is also useful. If output has dropped compared to the same period last year and weather patterns are similar, contamination is a likely cause. If you have no output baseline to compare against, you have no way to know what you are losing.