Before you go...
We built a free scorecard that shows how your heat pump, ventilation and solar systems are performing. Results are usually surprising.
Get my score
No thanks
We built a free scorecard that shows how your heat pump, ventilation and solar systems are performing. Results are usually surprising.
No thanksWe built a free scorecard that shows how your heat pump, ventilation and solar systems are performing. Results are usually surprising.
No thanks
DVS makes two types of ventilation systems. The Reclaim range uses a heat exchanger and balanced pressure to recover warmth from air leaving the house. This article focuses on the more common positive pressure models, which cover the majority of DVS installations in New Zealand homes. This article is specific to DVS systems. If your wall controller shows SmartVent, see the SmartVent filter replacement guide. If it shows HRV, see the HRV filter replacement guide.
Your positive pressure system draws air from the roof cavity, filters it, and pushes it into your living areas. That positive pressure forces out damp, stale air and reduces condensation on windows.
The filter sits directly at the fan inlet in the roof cavity. Air passes through it first, before the fan pushes it through the ducting into your rooms. When the filter blocks, the fan has to work harder to pull air through the restriction. Airflow drops. Rooms feel stale. In winter, window condensation can return as the system falls behind on moisture removal.
Your filter is catching everything that air from the roof space carries. In a typical New Zealand home, that includes dust from old insulation, building paper fibres, wood dust from borer activity, and in some homes, rodent droppings. The roof cavity is not a clean environment. What builds up on the filter over 12 months reflects what would otherwise be entering your home.
DVS recommends replacing the filter every 12 months. That guidance is consistent across all system models and written into the official documentation.
For most homes, 12 months is a reliable guide. If the roof cavity is unusually dusty, or there's been construction activity nearby, it may be worth changing it sooner. The same applies if you notice the system seems less effective at clearing condensation or keeping rooms smelling fresh before the 12-month mark. Twelve months is a guide, not a fixed rule.
Your wall controller displays a filter change reminder on an annual timer. When the message appears, the filter needs replacing. After installing a new filter, the reminder needs to be reset through the Utilities menu on the controller. It won't clear itself, and many homeowners don't know the reset step exists.
Three options are available to DVS owners.
The genuine DVS filter is the EcoStatic, made using New Zealand wool by Lanaco. DVS states on their website that it's more than 99% efficient at 2.5 microns. They don't publish a standard EN779 filtration grade anywhere in their manuals or product pages, so a direct comparison with independently graded filters isn't possible from published data. What's clear is that it's the warranty-safe choice and is designed specifically for DVS systems.
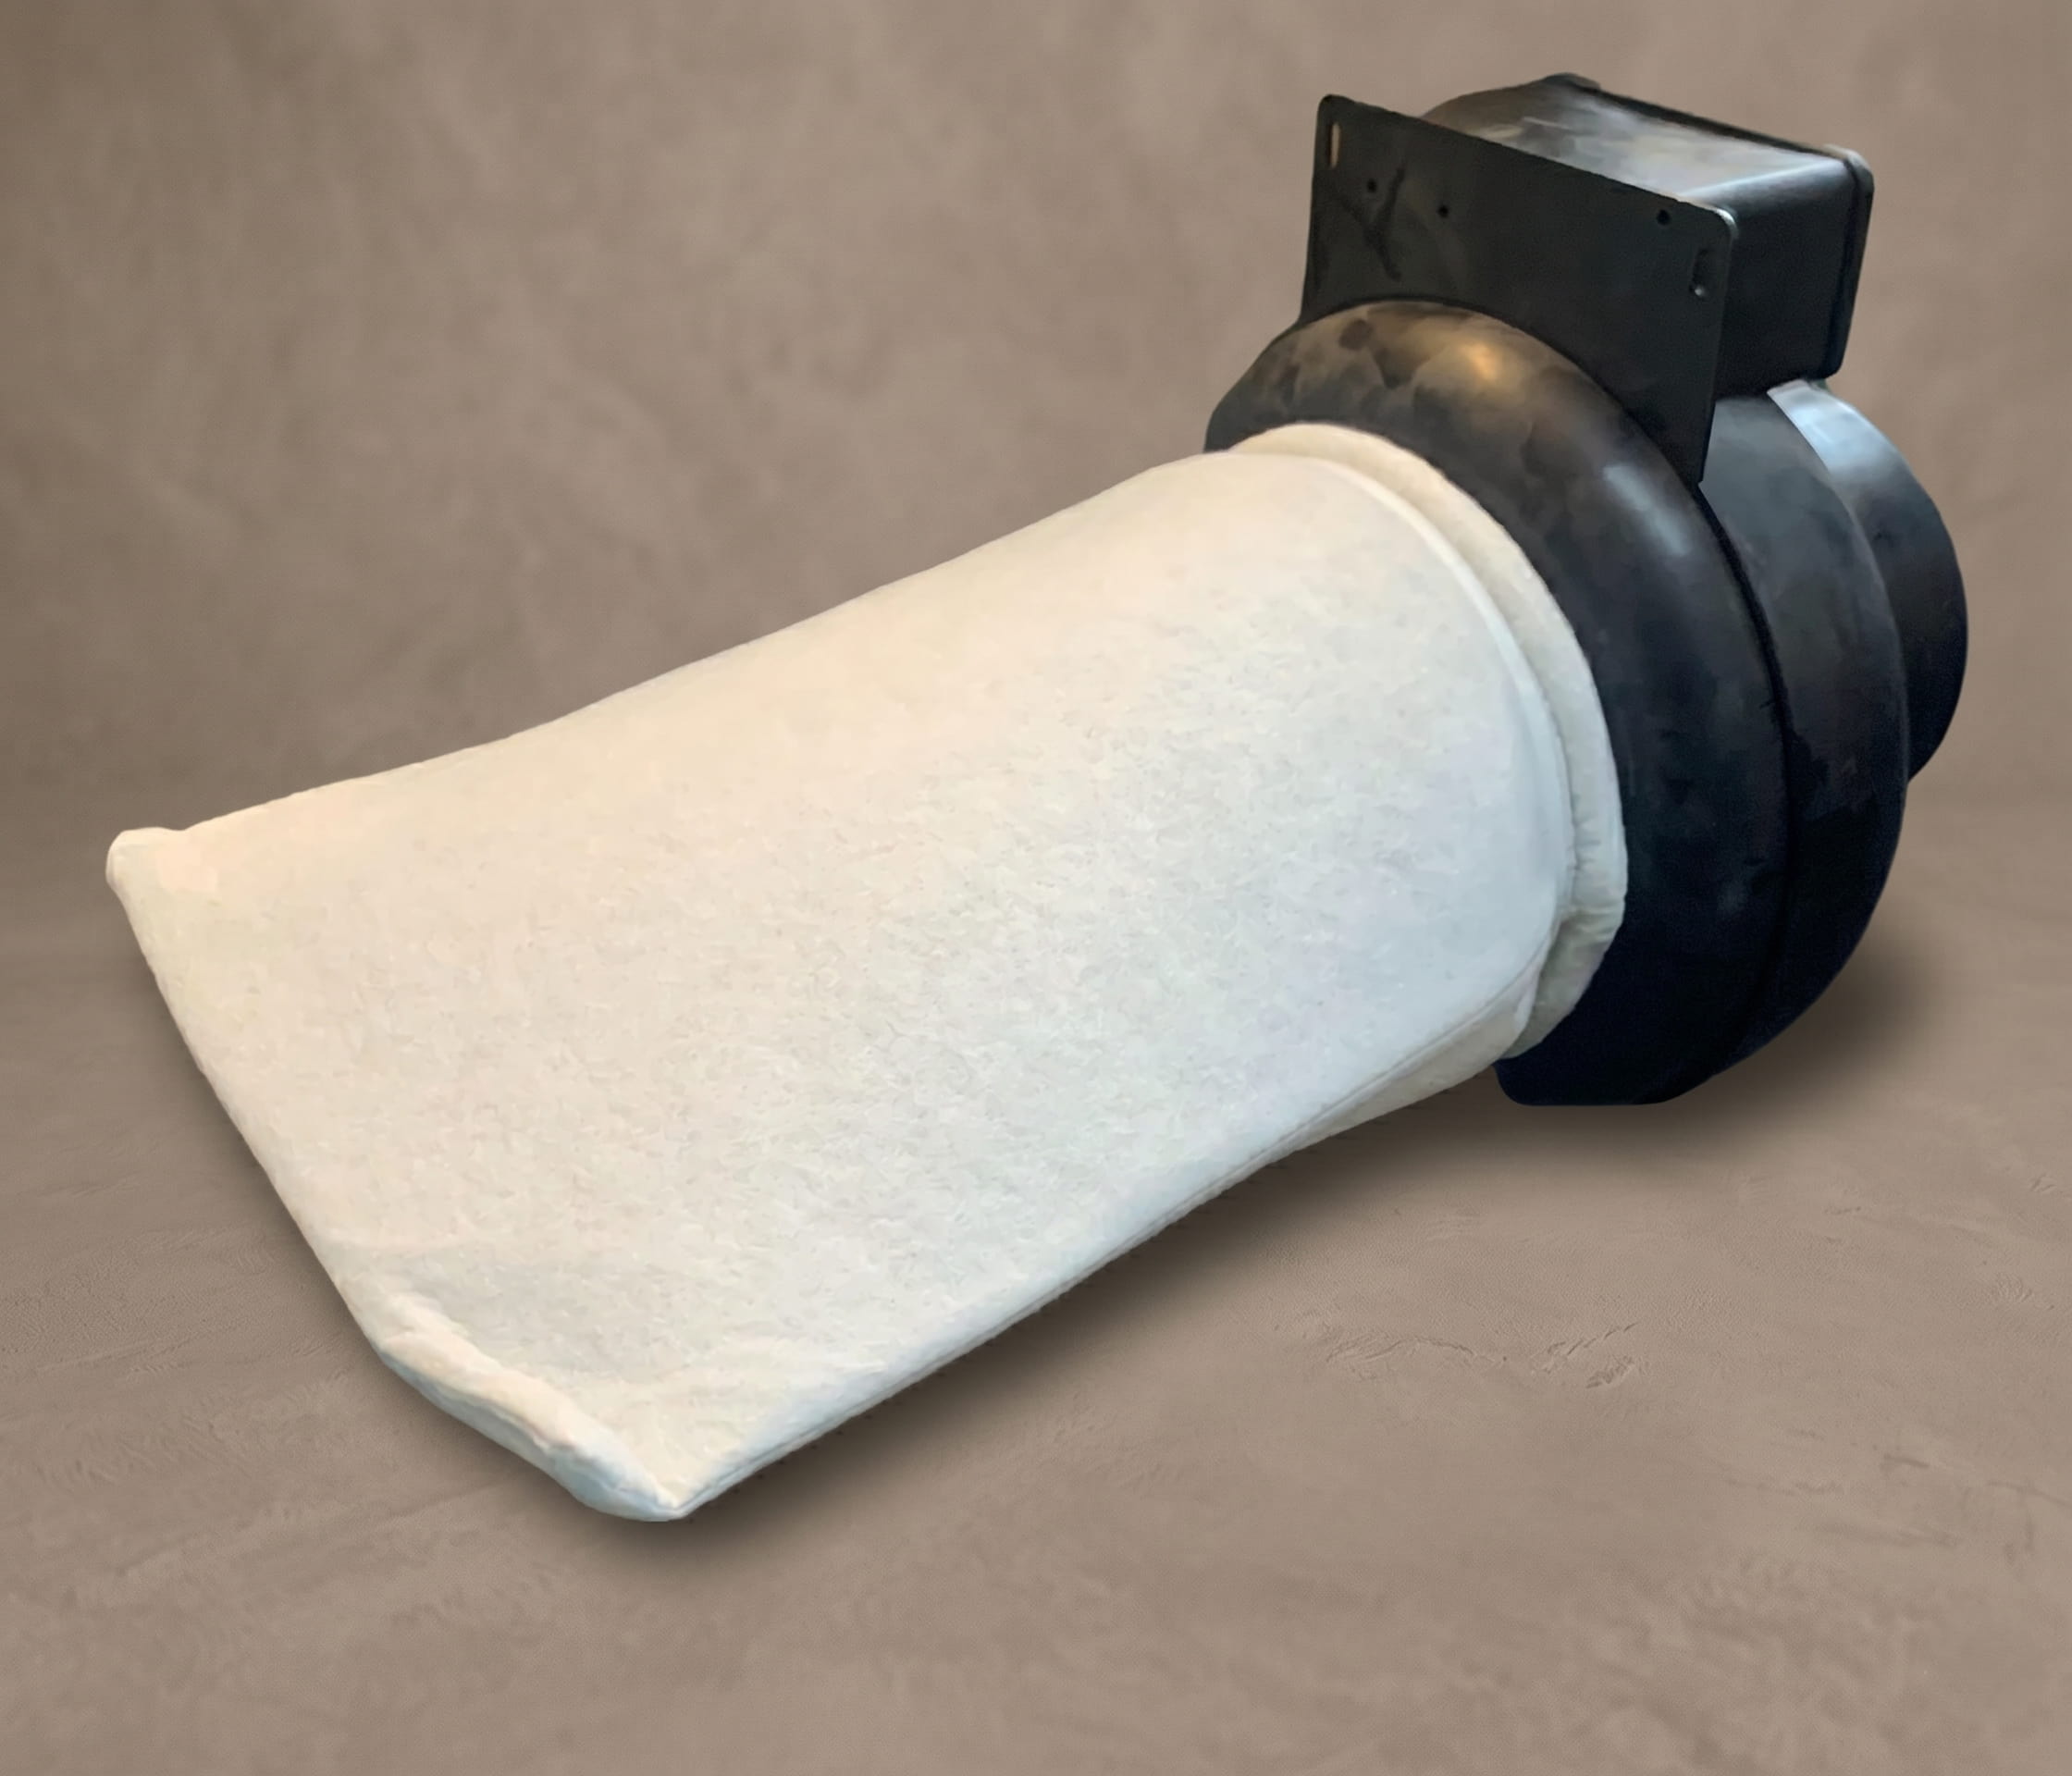
A third-party F7 sock filter is available from specialist ventilation suppliers. The F7 designation is an EN779 standard, which means the filtration performance has been independently classified. F7 captures finer particles than G4, including mould spores and smaller allergens. The cylindrical design gives it a larger surface area than a flat filter, which helps maintain airflow and extend fan motor life.
The Supercell G4 bag filter is sold at Bunnings and Mitre 10 and listed by the manufacturer as compatible with DVS, SmartVent, and Supervent systems. G4 is an EN779 grade that catches larger dust particles. It's a classified product, not a random generic filter. G4 captures less fine particulate than F7 by definition of the EN779 classification.
The honest comparison between the EcoStatic and the F7 third-party option is limited by the fact that DVS doesn't publish the EcoStatic's EN779 equivalent grade. Without that, you're comparing a manufacturer's performance claim against an independently classified standard.
The DVS warranty documentation states: "The DVS Filter cannot be cleaned. Not replacing your filter with a genuine DVS filter may void your warranty."
The word "may" is ambiguous. DVS hasn't published guidance on what they enforce in practice. If your system is within its five-year warranty period, using a non-genuine filter carries that uncertainty. Washing or vacuuming a dirty filter is addressed more directly: the manuals state it destroys the filter's ability to clean the air.
DVS filter change: DIY or professional
Yes, if you're comfortable and safe navigating your roof cavity. The filter pulls off the fan inlet, the new one slides on, and you secure it firmly with a tie. Before going up, the DVS manuals are specific: switch the system off at the wall controller and unplug the 3-pin plug at the unit in the roof. Take a torch, scissors, and a dry cloth. Step only on load-bearing trusses or beams, not the ceiling material between them.
The DVS manuals suggest having another person home in case you slip. That's practical advice for a dark, confined space.
When fitting the new filter, make sure it's properly secured to the fan inlet. A filter sock that isn't tied off correctly can work loose over time. If it falls off entirely, the system draws air directly from the roof cavity with no filtration. Dust levels in the home increase and the air carries whatever the ceiling space contains. You wouldn't know from inside the house unless you noticed higher dust levels or an unusual smell through the vents.
A professional ventilation service and a DIY filter change aren't the same scope.
Changing the filter is one task. A full service covers the filter, the fan housing, the complete duct run, the ceiling diffusers, and the intake area. See what a MiHT positive pressure ventilation service includes.
Ducting inspection means crawling the full roof cavity to check the entire duct run, not just inspecting around the fan unit. Flexible duct connections can work loose over time, particularly in roof spaces that experience large temperature swings. Summer heat degrades the adhesive at duct joints. When a connection fails, the system pushes air into the roof cavity instead of your rooms. The system still runs. Nothing alerts you.
Rodent activity in the ceiling can also damage ducting. A hole in the duct run lets contaminated roof cavity air into the system before it reaches your living spaces.
By the way; if you want to see what hidden dust and allergens a basic filter change leaves behind , take our 3-minute diagnostic. Find out the true health score of your DVS.
The most immediate change is the smell of the incoming air. It's fresher, and most people notice it straight away after a filter change.
In winter, a system back to full performance clears window condensation more effectively. Rooms feel less stale. If the system has been blowing cold air regardless of filter condition, that's a different issue. Why your DVS, SmartVent or HRV system blows cold air in winter explains what your controller is actually doing and what settings to check. For the full explanation of what drives condensation in NZ homes and what else to check, see condensation on windows in NZ: what causes it and how to reduce it.
Yes, if you're comfortable and safe navigating your roof cavity. The filter slides off the fan inlet and the replacement ties on in its place. The DVS manuals specify switching the system off at the wall controller and unplugging the 3-pin plug at the unit before you start. You'll need a torch, scissors, and a dry cloth. Walk only on load-bearing trusses, not the ceiling material between them. If you're not confident up there, a professional filter change is available through DVS or a ventilation maintenance company.
The filter becomes blocked with roof cavity dust, which forces the fan to work harder for less airflow. Rooms start to feel stale and window condensation can return. Left long enough, a blocked filter can cause equipment damage and shorten the life of the system. The DVS manuals note that a neglected filter may result in equipment failure. For a full picture of what builds up inside a DVS system that goes without professional maintenance, read what happens inside an old DVS system that isn't maintained. For how filter neglect affects how long the system lasts, see how long a DVS or HRV system should last in NZ.
The genuine DVS EcoStatic is the warranty-safe choice and fits all DVS positive pressure systems. A third-party F7 sock filter is available from specialist ventilation suppliers and carries an independently classified EN779 F7 rating. The Supercell G4 is available at Bunnings and Mitre 10 and listed as DVS-compatible by the manufacturer.
The DVS warranty documentation states: "Not replacing your filter with a genuine DVS filter may void your warranty." The word "may" leaves room for interpretation, and DVS hasn't published guidance on what they enforce in practice. If your system is within its five-year warranty period, that ambiguity is worth factoring into your decision.
After replacing the filter, go to the Utilities menu on your wall controller and select the filter reset option. The exact label varies by model but is typically listed as "Replace Filter" or "Filter Reset." The reminder won't clear itself after a filter change. If you skip the reset, the warning will remain on screen regardless of whether the new filter is in place.
A filter change replaces the filter at the fan inlet. A professional service covers the filter, the fan housing, the ceiling diffusers, the intake area, and the full duct run. Inspecting the ducting means crawling the entire roof cavity to check every duct connection, not just checking around the fan unit. Disconnected ducts, rodent damage, and a filter sock that has come loose from the inlet are only visible from inside the roof space. A filter change addresses one component. A full service checks the condition of the whole system.
Not sure what condition your system is in?
The Home Energy Health Assessment takes about three minutes. Answer a few questions and get a personalised result showing where to focus first. Free, no booking required. Start the Home Energy Health Assessment